
Last updated: First published:
The Inspection Chamber

The Inspection Chamber allows you to examine the details of view transitions. It’s designed for use during development and supports both same-document and cross-document view transitions.
Place your pages in the Inspection Chamber and put the view transitions through their paces. You can thoroughly examine each transition: play it in slow motion, examine timings step-by-step, disable transitions or highlight the pseudo elements — everything is easily achievable here.
PREREQUISITE
The Inspection Chamber currently only works with Chromium browser (Chrome, Edge, \hellip;), starting from version 126. Additionally, you might need to enable the “viewTransition API for sub-frame navigations” feature, because the Chamber will only work if cross-document view transitions are also supported inside iframes. If you have to enable this feature manually, enter chrome://flags/#view-transition-on-navigation-iframe into the browser’s address bar and select Enabled from the drop-down menu.
Installation
To start up the Inspection Chamber on your pages, you can install the npm package in your project. Alternatively you can load the script from one of the global content delivery networks that provide npm packages.
- Install
@vtbag/inspection-chamber@latestfrom npm. - In your project, add
@vtbag/inspection-chamber/lib/index.jsas an inline script at the beginning of the<head>element on all pages that use view transitions.
Details depend on your project setup and the frameworks used, but it can be as simple as:
import chamber from "@vtbag/inspection-chamber?url";
<html>  <head>    <script src={chamber} />    ...  </head>  ...</html>;
You can load the script from CDNs such as jsdelivr.net or unpkg.com. Place the script inline at the beginning of the <head> element on all pages that use view transitions.
Using jsdeliver.net:
<html> <head> <script src="https://cdn.jsdelivr.net/npm/@vtbag/inspection-chamber" /> ... </head> ...</html>or alternatively using unpkg.com:
<html> <head> <script src="https://unpkg.com/@vtbag/inspection-chamber" /> ... </head> ...</html>Inspection Modes
The Inspection Chamber supports different modes of inspection. Common to all modes is the ability to examine the pages before and after the view transition and the requirement to explicitly start the view transition under examination to invoke the selected inspection mode.
For details see the description of the modi below.
Hint: If selected, Tutorial mode prominently displays usage instructions!
-
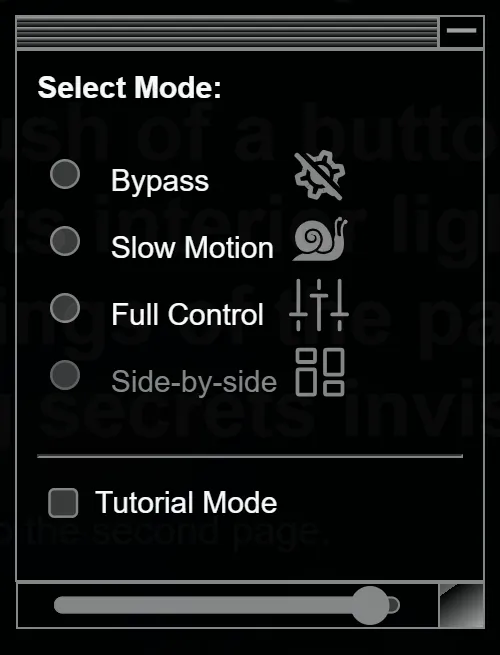
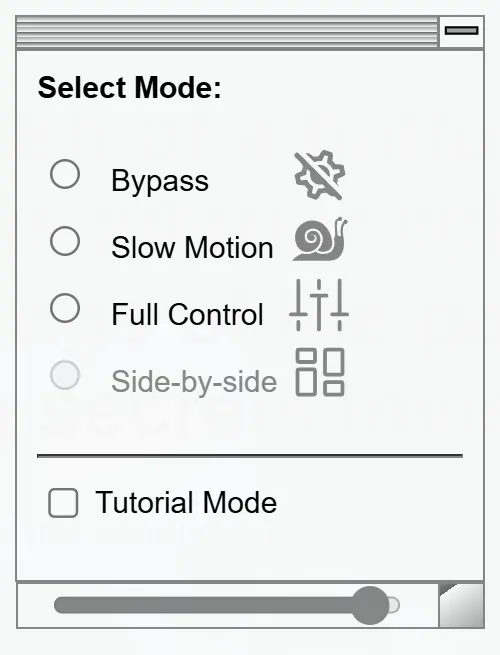
Choose an inspection mode from Bypass, Slow Motion or Full Control.
-
Highlight elements with view transition names by selecting the frame elements toggle.
-
While no transition is active: Identify elements with view transition names by clicking on them on the screen or in the name list. To prevent active elements like links from starting a navigation during examination, hold both, the Ctrl and Shift while clicking them.
-
Start a view transition by clicking its trigger such as a link or a button on the page.
-
While a transition is active: Identify pseudo elements by clicking on them on the screen or on a name in the name list. Hide some old or new images to get a better view on the details you want to examine.
-
Drill down into the animations. In Full Control mode, see what animates the pseudo elements, and even disable single animations if you’d like to better understand how the overall effect is composed from individual pieces.
-
End the current view transition: In Bypass and Slow Motion modes, the view transition will play once and then end automatically. Full Control mode must be ended explicitly. To do this, either click the “Exit” button in the Full Control panel, click on the Play Indicator, or select another inspection mode.
Note: View transitions are automatically skipped by the browser if the window is resized or its orientation is changed.
Bypass
Bypass mode does not intercept the transition but just shows the normal animations.
Slow Motion
Use the slider to set a time stretch factor and see the view transition in slow motion.
Full Control
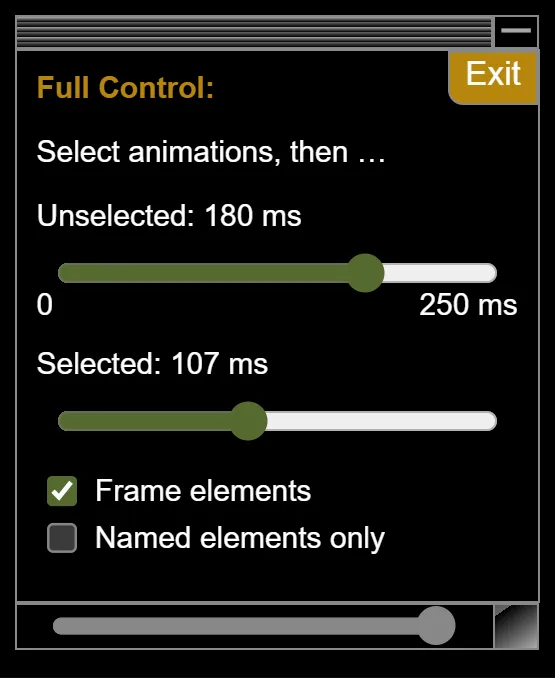
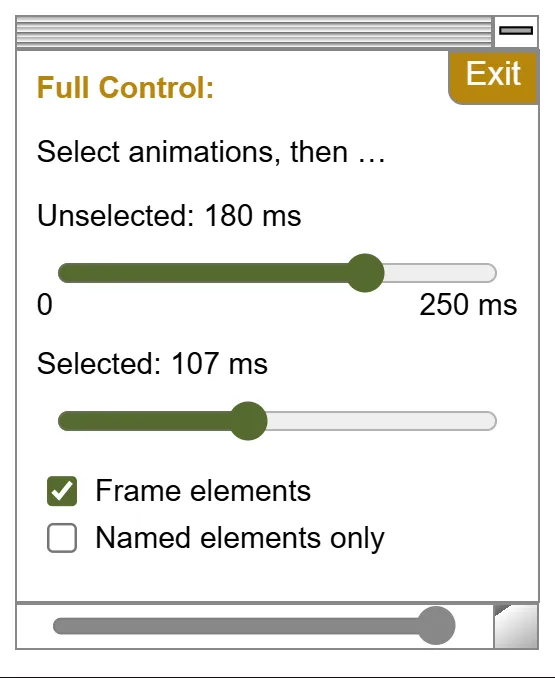
Here you got two sliders: The lower slider animates the initially empty set of selected transition groups. The upper slider controls all other elements. Thus if you do not select transition groups, the upper slider controls all groups.
Use the Name List to select one or more transition groups to be controlled by the lower slider. In Full Control mode, clicking a selected name unselects it. You can reset all names by pressing the reset button of the name list.
To exit Full Control mode, click the exit button in the full control panel or click the Play Indicator in the upper left corner of the page.
Name List
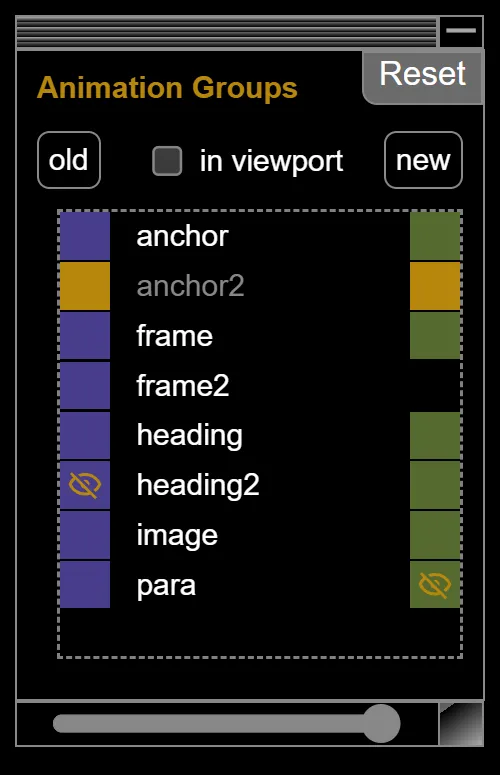
The list shows the names of elements with view transition names and as soon as a view transition starts, it shows the names of the view transition groups. Clicking in the list highlights (pseudo) elements in the page. Clicking (pseudo) elements in the page, highlights the name in the list.
Identifying elements this way also copies a selector to the clipboard that can be used to select the element in the browser’s development tools. To do this, paste the selector into the console window and hit return.
During view transitions, the name list shows a purpleish square to the left and/or a greenish square to the right of a name if the group has a old-image (purpleish) and/or a new-image (greenish). If the images are outside of the viewport, the color changes to a shade of orange. You can click those squares to hide/unhide the images on the page. This can be particularly useful when you want to examine details of crowded areas of the page.
Extra: click the new and old buttons above the name list to switch the visibility for all names at once. This is handy if you want to hide all but one image, for example.
Animation Panel
Each of the pseudo-elements introduced by the view transition API may feature multiple animations, either automatically generated by the browser or defined using CSS. Here, you can see them all. Dive into the details or disable specific animations to understand how each one contributes to the overall effect.
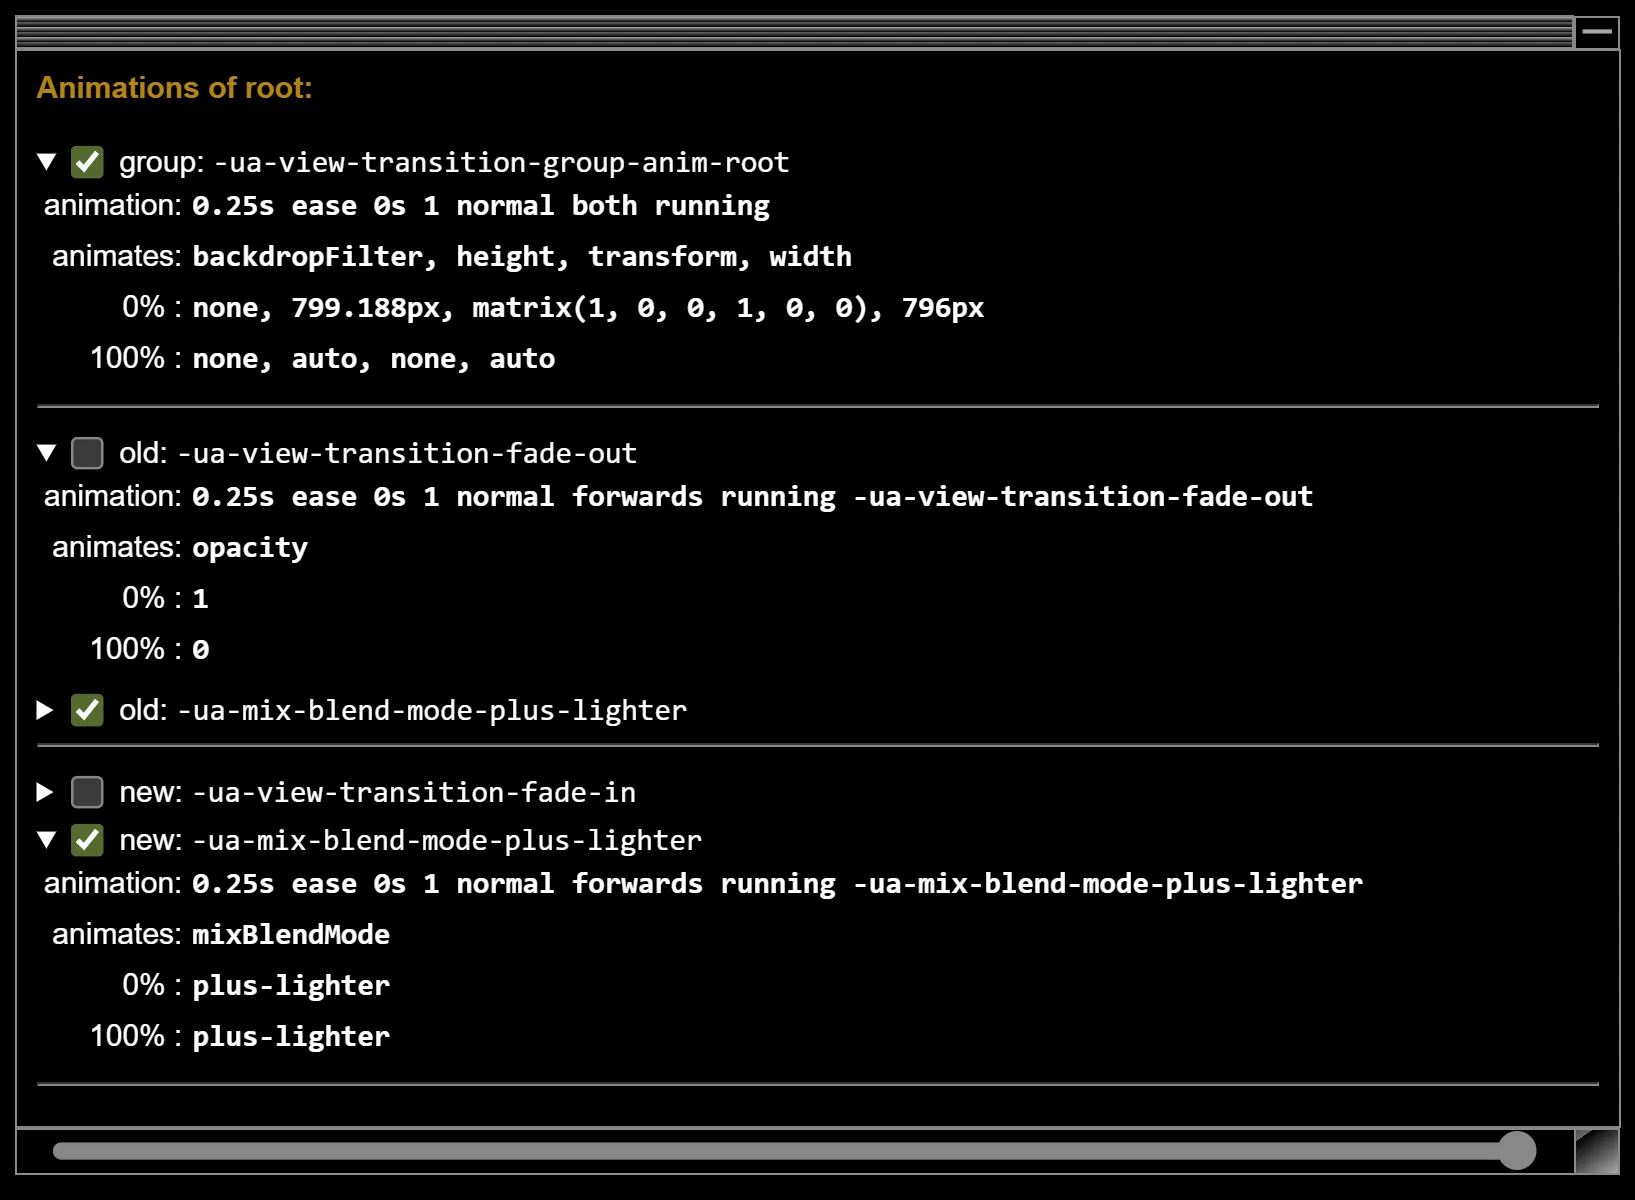

You may see entries that do not have a checkmark but show a ⚠️ instead. This means that the key frames of the animation could not be found. A ⚠️ instead of the list of animated properties indicates that there may be errors in the definition of the keyframes.
Filter Panel
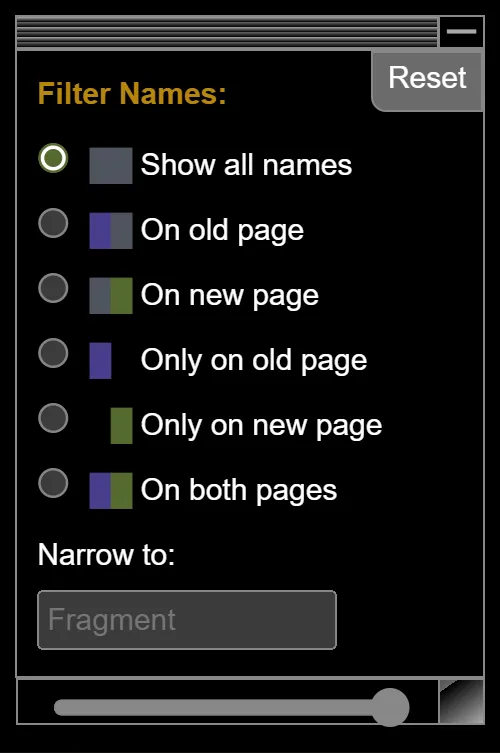
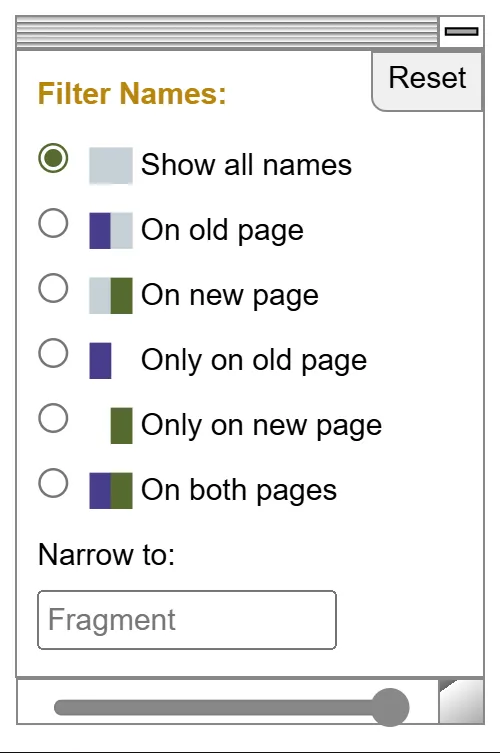
You can restrict the entries in the Name List by specifying a fragment of their name. During an active view transition, you can also filter the entries based on the presence or absence of their old and new images.
Toggles
Frame Elements
Toggle the option to add a frame to specific elements:
When no view transition is active: frame elements with a view transition name. When a view transition is active: frame the pseudo elements.
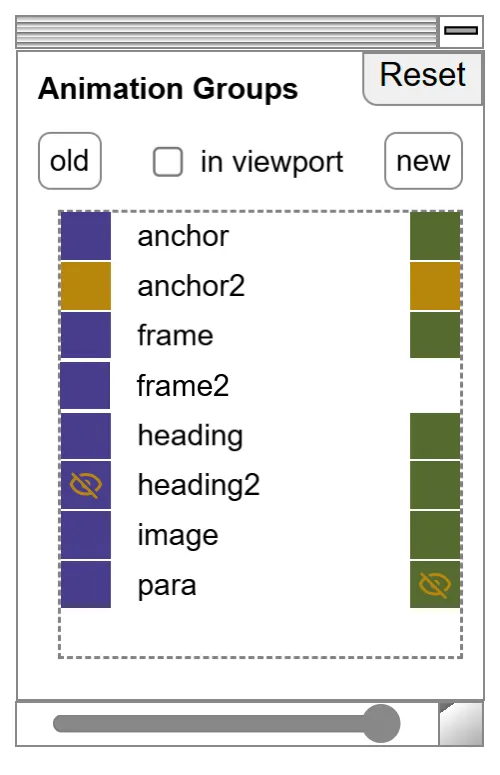
In Viewport
If this toggle is checked, the Name List only displays groups that are within the viewport. Other entries are collapsed into a thin dotted line.
Tutorial Mode
Usage instructions are displayed so prominently that you can hardly see the screen.
Panel Controls
Play Indicator (⯈)
The play indicator in the upper left corner shows that a view transition is currently active. Click it to stop the view transition. You’ll also notice that the headings of the panels change color while the indicator is visible.
Dark / Light mode (◑)
What you would expect.
Switch Panel Side (⤪)
Select your preferred celestial direction.
Standby (🗕)
Collapses the panel and shows a small standby indicator instead. The indicator can be freely positioned on the screen. Click it to reactivate the panel.
Resizing the Panel (⇼)
You can grab the border of the panel to resize it.
Enlarge Sub-Panels (⊟)
Click on the headings of sub-panels to enlarge them. Another click on the heading will switch the panel back. The enlarged panel also has a button at the upper right to return it to the side panel.
Move the Sub-panel (𝄛𝄛𝄛)
Drag the enlarged sub-panel by the top border to move it freely around.
Resize the Sub-panel (◩)
Drag the handle in the lower right corner to resize the enlarged sub-panel.
Reduce the Sub-panel’s Opacity
With the slider in the bottom border of the enlarged sub-panel you can increase its transparency.
Additional Notes
Sporadically appearing red headings
With a large number of view transition names on a page, the Inspection Chamber can overheat. If you see some dark red headings, be patient and give it a moment to cool down.
Stability
The implementation depends on Chrome’s ability to The implementation relies on Chrome’s experimental ability to support cross-document view transitions in iframes. There may still be many flaws, possibly due to my understanding of the new technology. Changes to the underlying browser implementation are likely to impact the functionality of the Inspection Chamber. Please keep me informed of any malfunctions you observe.